Thursday, 17 July 2014

Less Meat, More Veggies

Now that I know that I need to increase my fruit and vegetable intake and decrease my meat consumption,  I’m looking for new recipes to get more fruit and vegetables in and find ways to stretch out the little bit of meat I should have in my diet.  This is what I'm doing:

1) Blend & Extend: It’s funny how sometimes information finds you at just the right moment.  Last night, I happened upon a twitter party hosted by the Ontario Beef Farmers and Mushroom Canada. (Did you even know there was a Canadian mushroom group?? Neither did I!) They were bringing attention to something they call “Blend and Extend,” which is basically stretching out your ground beef recipes by adding chopped mushrooms, because they can have a similar texture and mix in well. As a bonus mushrooms add more than I thought they would. (See http://www.blendandextend.ca/fresh-mushrooms-and-your-health/ for more information.) I’ve done this before with spaghetti sauce, but hadn't taken it any further. Since mushrooms are added to a lot of meals in my house, it's a perfect strategy.  They also created a website for Blend and Extend, which includes some recipes.   I’m going to try this one: http://www.blendandextend.ca/portfolio/taco-salad/ and I may try to alter my own chilli recipe so that it uses the blend and extend idea. 

2) Meatless Monday: I’m going to try to work a meatless day into my week, to try some alternative ways of getting protein and mix it up a bit.  I found this website http://www.meatlessmonday.com/ to help. It includes lots of recipes and little recipe e-books free to download.  The whole vegetarian thing is a bit scary for me.  The recipes always call for things I’ve never used before, so this could be an adventure.  I’m going to try though!

3) Soups: I love soup.  I think I would eat homemade soup everyday if I could. In an attempt to pack more veggies into my meals, I’m going to try to look for some vegetable soup recipes that will allow me to add vegetables without having to eat a salad or a side of cooked veggies all the time.  That gets boring to me, so I need to mix it up. So, I’ve been pinning lots of soup recipes, especially tomato and blended vegetable soup recipes, and hope to try one or two this weekend. 

So, now I've got my to do list. See, this blogging thing really does help me focus a little more!  I’ll let you know how it goes.  I'll try to have some yummy recipes to share next week.
 
Do you have any tips on how I can cut down on the amount of meat I eat while upping the servings of veggies I eat?  Or maybe you have a really yummy soup (or exciting salad) recipe you’d like to share.  Let me know! I need all the help I can get!

Meet with a Dietician – Check!

I’m on the road to healthy eating!

Step one – find a way to learn what is really healthy and what my body REALLY needs.
You see, when deciding that I wanted to eat healthier, I ran into a bit of a problem.  I felt like I really didn’t know what foods are healthy. That's a little embarrassing to admit, but as I said before, there is so much information out there, and it all seems to be conflicting.  I have felt so stressed out shopping for food, because everything I looked at seemed dangerous. 
That red meat? Evil! – too much fat!
That pasta? Evil! – too many carbs!
Carrots? Evil! – too much sugar!
Milk? Evil! - no cow's milk for humans!
(Well, if you can't eat meat, pasta, vegetables or milk, what CAN you eat?!?)

Ahh! My busy mind was going in circles. I thought I was going to lose it.  I was afraid to eat anything, would get frustrated, and end up eating garbage anyway. 

I had thought about going back to some programs I had tried in the past, but if they didn’t work, then they're definitely not going to work now that I have a baby to take care of.  My husband and I figured that we needed to see someone with actual training and knowledge based on science – no gimmicks, no fads.  We decided that a Registered Dietitian would be the way to go, because they have specialized training (in New Brunswick, at least a bachelors degree and internship.)

Last night was our first meeting.  It was eye-opening. I got a lot of information, so I’m going to try to deal with it one step at a time.

The first thing we looked at was Canada’s Food Guide.
I’d seen it a million times. I’m sure every Canadian has. Same old, same old.  But wait, apparently I hadn’t really paid enough attention to it because my eating was WAY off.    

Based on the food guide, this is what I should eat each day:
·         7 servings of fruit and vegetables
·         6 servings of grain products 
·         2 servings of milk and milk alternatives
·         2 servings of meat and alternatives
 
Just looking at the number of servings was surprising. I went into this thinking I didn’t eat enough fruit and vegetables and loved carbs a little too much, but thought I was doing well with the meat and milk groups.  Protein is good, isn’t it? Eggs, chicken, beans, nuts – all good, right? Milk, yogurt – yummy and healthy! Apparently they are, but not too much! 

When we started looking at serving sizes, it became blaringly obvious that we were overeating – even on the good stuff! Our meeting was at a grocery store, and we actually went out into the store to look at serving sizes.  The shocking food was meat.  One serving size of meat/fish/poultry is 75g or 100g raw. One steak that we would typically cook was almost 3 servings! That’s more than what I’m supposed to eat in one full day!

I felt like I really should have known all of this! How foolish that I didn’t! It’s Canada’s Food Guide! I’ve seen it in different forms since elementary school!

I got more information than this, but this is what I’m dealing with now - food group balance and serving size.  Baby steps. It’s important, so I want to do it right.

Do you follow Canada’s Food Guide? If you do, give me some tips! If you don’t, feel free to share what works for you.  I love a good success story!

Tuesday, 15 July 2014

Sewing: A New Obsession!

In March, I took a three week sewing class.  It’s been something I’ve wanted to learn for many years, but never seemed to make time for.  I loved Home Ec. class in Junior High, when we got to learn cooking and sewing.  When I saw that an adult sewing class was being offered at a local children’s sewing school, I decided that it was my chance.  It was also a “get Mommy out of the house” project.  A chance for me to do something other than take care of my son, which had pretty much been my life 100% of the time for the past 5 months.  I certainly love that, but I knew I needed to learn how to be away from him, and he needed to be okay being away from me. 
Brother CS6000-i
Since taking the class, I bargain shopped for a sewing machine and have enjoyed practicing and learning new techniques.  My first project, for the class, was a pair of pyjama pants. They didn’t fit me well and had to be shortened into capris because they were too short for me.  Flattering, they were not!  To top it off, they fell apart after wearing them a couple of times. I’d say that project was a total fail. Luckily, I’ve had some successful projects since then. 


My second project in the class was a purse.  I use it all the time as a mini diaper bag. I love the material. 


At the same time, I made a pillowcase.  Now that I see the picture again, I think I need to make some more of these.  It was a super easy project that gave me a chance to learn about my sewing machine.  I made it a little too long, but since I guessed what measurements to use, I think it turned out pretty good.  Plus, the pillow doesn't inch its way out, because it's extra long.


My first big solo project was a fun one.  We were going to a birthday party and the theme was a princess party.  Since it was April, it was hard to find a costume for a baby, so I thought I’d make one.  It was a challenge! I made a pattern, by tracing the outline of one of his onsies and designed a tunic based on that sizing. Then, I looked on Pinterest for some ideas.  It was really fun to make and I was able to learn some new techniques to create the tunic, belt, and crown.  I think Little C had fun wearing it too. He was all smiles when he had it on. Hopefully, I’ll be able to make his Halloween costume for him this fall.


Since then, I’ve been making a lot of baby stuff.  I thought sewing would be a nice way to make personal gifts, and a way to make some fun things for my son.  They’re also small projects, which give me the chance to practice, and I can do them during nap time.  Here are some of the projects I’ve made:

taggy blankets, soother/toy tether, bandana bibs, stroller lap blanket
My absolute favourite baby project is the bandana "dribble" bib.  I've made a ton of these! I found the pattern on Pinterest and love it.  Instead of having a snap or Velcro to attach the ends, it uses a single button hole on one side, which you pull the other side through.  It’s really easy to remove, and there aren't any scratches from Velcro, which has been a problem for my son. They're great for teething babies! Here is the link to the pattern: http://leafytreetopspot.blogspot.ca/2014/02/free-pattern-and-tutorial-baby-dribble.html

back of the bandana bib
 
My big sewing goal is to make a quilt. Any quilt would do, but I saw a quilt on Pinterest made of outgrown onsies. It was kind of one of those crazy quilts – random size pieces, no real order, fun stitches. I loved it, and thought it would give me an excuse to keep some of Little C’s outfits.  I had recently packed some of his outgrown baby clothes away, and it was a major boo-hoo task.  (Why is it so hard to pack away outgrown baby clothes? It’s not like I want him to stay a baby forever... although it would be nice if he could stay little for just a little longer though...)

To start practicing for a baby outfit quilt, I’ve been working on a simple quilt.  I found a pattern on Pinterest (here is the link: http://neverenoughhours.blogspot.ca/2010/08/fat-quarter-baby-quilt-tutorial.html) and have been working on it on and off.  There's good and bad to this quilt.  The good? It's been fun and I've been learning lots. It has also been a budget quilt, so a great one to start with, in case I mess it up! It's made of fat quarters, which I was able to get really cheap.  I am using a piece of leftover flannel for batting, and got a piece of fun fabric for backing at a good sale.  It is probably costing less than $15.  The bad? I've got a lot to learn! Sometimes have no idea what to do. When I start to get stuck or frustrated, I take a break. Currently, I’m at the quilting stage and on a break. I feel like it’s turned out pretty well up to this point, and I really don’t want to mess it up.  It’s a bit scary.  Because I have zero hand sewing skills, I’m trying machine quilting.  My hope is to eventually try some hand sewing, but not yet.  This is what it looked like when I made my “quilt sandwich” with the top, batting (I used a piece of flannel), and backing. It doesn't look like much now, but hopefully (fingers crossed!) it will come together soon.

 
So there are the highlights of about four months of sewing adventures.  I feel like I’ve accomplished quite a bit, considering I have a baby to take care of. I still have a lot to learn! I’m always looking for new ideas (thank you, Pinterest!) and will continue to work at getting better!

Saturday, 12 July 2014

Summer Adventures - My Summer Bucket List

Summer goes by way too fast. For me, the end of summer is a double hit this year though. When summer ends, so does my maternity leave. While sticking to my strict maternity leave budget, I've decided that I need to pack in as much fun as I can, so I made a list. Hopefully, that will keep me from getting too scattered and help me make the most of the time I have left as a stay-at-home mum. 

Some of these things I’ve done before, but never with a baby, so I’ll definitely be experiencing them with new eyes.  Hopefully they're stroller-friendly!


Last summer, I didn’t go many places, because it was abnormally hot (at least it seemed that way to me, a pregnant, soon to be mummy) and my ankles were abnormally swollen. This year, I’m hoping to enjoy my summer a little more.  It's already July, so there are only 6 weeks left.  Can I check every item off my list? I'm certainly going to try!


1) Zoo (Cherry Brook or Magnetic Hill)– Honestly, I’m not a huge fan of zoos, because I always feel like the enclosures are too small, but I think my son would love to see some of the animals. He loves our pets, and there are pictures of animals on the walls of his room, so I’d like to see what he thinks of big animals.  


2) King’s Landing – neither my husband nor I have been to Kings Landing for MANY years, so we thought it would be a fun little day trip. 


3) Eat at Ossies Lunch - As a kid, this was one of my favourite places to eat in the summer. You get to place your order, listen for your number and eat outside on picnic tables.  What could be better than that? The food is amazing! An old-fashioned take-out specializing in seafood. Soooo yummy! You haven't had fried clams until you've had Ossie's fried clams. Seriously.  Even Chef Michael Smith has said they have he best fried clams in Canada! (https://twitter.com/ChefMichaelSmth/status/19290544489 ) I haven’t been there in a couple of years, so this summer, it’s a must-eat! This is their Facebook page, in case you're interested: https://www.facebook.com/ossieslunch 


4) Make Pickles – I’ve never made real pickles – like dill or bread and butter.  I’ve successfully made pickled beets and chow chow, but never pickles.  I’ll have to do a little research, but hopefully I can do it! (If you have a good recipe, help me out!)


5) Playgrounds – Since C. loves playgrounds, it’s time to find some really fun ones.


6) Uptown Saint John Public Art Tour – I have a brouchure with a self-guided public art tour from Uptown Saint John.  I think this will be a little day activity for C and I.


7) Farmers Markets  (The Boyce Farmers Market in Fredericton , and the Kingston Market on the Kingston Peninsula) – I haven’t been to the Fredericton Market in a few years, and I’ve been really wanting some of the good eats you can find there.  Even though it’s a year round farmers market, It’s best in the summer and fall, I think. The Kingston Market is closer, so it should be an easy check off my list.


8) Visit St. Andrews – I always visit St. Andrews-By-The-Sea at least once during the summers.  I didn’t get there last year, so this year I have to get there!

9) Attend the Buskers Festival -  Buskers come to Saint John every summer. I've seen performances while visiting PEI, but never in my own city.  I have to change that this year.  Since they are coming up pretty soon, I should be able to check this off my list quite quickly!

6 weeks, 9 adventures! I better get started!

Friday, 11 July 2014

Turn Your Clutter Into Cash: Host a (Successful) Yard Sale

I’m getting ready for a yard sale.  I haven’t had one in a couple of years, and my house is starting to get a bit cluttery.  Holding a yard sale can be a lot of work, but it can also be worthwhile.  It’s a great way to make some extra cash for the summer.  Over the years, I’ve had many successful yard sales, so I thought I’d share some of my tips for a money-maker yard sale.

1) Collect early: I usually have a box in my house that is dedicated to a yard sale.  Throughout the year, I toss things into the box. It may be some dishes that I’ve upgraded, a movie that we never watch, a knickknack or decoration that doesn’t match anymore, or <gasp!> a gift I’ve received that I know I won’t use. This box can also come in handy if you have people ask for donations for different sales throughout the year.


2) Gather the Goods:  Yard-salers will often drive by to see if a yard sale is worth stopping for.  No one is going to stop for an old lawn chair and your collection of VHS tapes.  You want a good selection, so go through your house and gather all that "stuff" you haven’t used in years (and probably won’t use again.)  Don’t think you have enough for a sale? Join forces with family and friends.  Yard-salers love a multi-family yard sale, and you’ll love the company!  Sometimes, family members don’t know what to do with their cast-offs and don’t want the hassle of organizing a sale, so they may just give you a box or two to add to your sale.  Instant bonus!

3) Set a Date: Right now, I know I’ll be having a yard sale. It’s not going to be this weekend, but it may be next weekend.  I have to play it by ear, depending on weather, and when I can get everything together.  Don’t be stuck on a date, because you want it to be a nice day.  Be flexible enough to change it if the weather doesn’t cooperate.

4) Price Your Items: Yard-salers appreciate having a price already on your item.  Buy a package of stickers and a sharpie from the dollar store. I don’t price anything less than 25 cents, and try to keep everything under $5. Buyers will still haggle, but they will know what you think your item is worth.  Not sure what something is worth? Books, CDs, DVDs, will sell relatively low, compared to the original price.  If an item is in very good condition, you may be able to price it at a third or half of the original price.  Just remember that the items are used, so set a reasonable price.

5) Organize Your Items:  While some people love to dig through piles of stuff, many don’t.  For this reason, try to organize the items you’re selling.  I usually start going through my boxes a few weeks before. I put all the books, movies, and CDs together in one box. Kitchen stuff goes in another box. Toys will go together, etc.  Think ahead to what you’re going to physically put your items on for the sale.  Make use of any table or table-like surfaces you have. Bring out your kitchen table, coffee table, bench - even two chairs and a piece of wood can become a table. Set up can take a while, so plan for it.  If you have a garage, you can have your tables completely ready to go the day before.  Drag them out in the morning, or make it a garage sale!

6) Advertise.  You need buyers!   Put up a few brightly coloured, simple signs in the neighbourhood, near main intersections.  Post on your Facebook page, and invite your friends to share.  (Make sure the privacy setting on the post is set to public, so non-friends can see it.) The best tool I use is Kijiji. There are lots of online classified sites that would work, including Facebook groups.  In your ad, make sure that you include some key words – is it a multi-family sale? Moving sale? Do you have baby items? Toys? Camping gear? Video games? Retro/vintage/antique  items? Collectables? Tools? If you have something that you think will be a good seller, advertise it! Some buyers are looking for those keywords.
 
8) Day of Sale Tips: Have a small stash of change (quarters, toonies, loonies, and some $5 bills) and have a plan for your money. Make sure you keep it safe. You don’t want all of your hard work to be for nothing.  Also, that big collection of plastic grocery bags could finally be of use to you too. While some people bring bags with them when they go to yard sales, most don’t, and they’ll appreciate the offer of a bag.   

9) Leftovers: Once your sale is over, you’ll inevitably have some leftovers.  Don’t let them back in your house to re-clutter it!  Look for opportunities to pay it forward.  I set out boxes when I’m packing up. The best items go in the Hospice box.  Hospice sells the items in their shop and gives me a tax receipt.  Clothing goes to the clothing depot, who give clothing to those in need. Everything else goes to Value Village. They also donate to charity.  There are also organizations that will pick up leftovers.  Look for opportunities in your community.  You’d be surprised what you can find. It’s a great way to give back after a successful yard sale!  
 

Right now, I’m still gathering, organizing and pricing items for my yard sale.  Hopefully these tips will help me again this year. What do you do to make sure you have a successful yard sale?

Thursday, 10 July 2014

My Favourite Pinterest Adventures

I love Pinterest.  Well, I have a bit of a love-hate thing going on with Pinterest. I love all the ideas, and it’s my go-to place online, when I’m looking for something new to make, but I hate that it’s such a time suck.  Luckily I have a baby to take care of now, so I only get to go on Pinterest in two to three minute bursts now, but towards the end of my pregnancy, I would waste an entire afternoon.

I really only pin within three categories:

Food: In general, I’m a fan of food.  I’ve mentioned before that I love cooking and like trying new things.  I’m always looking for new recipes, because I get bored easily.  I use Pinterest more than my recipe books now.  I like that there is always a picture, which isn’t always the case with a book. 

Home/Organization:  My house is also always in reno-mode, so I’m always looking for ideas.  I live in a post-WWII one and a half storey homes.  Many cities and towns have neighbourhoods like mine – filled with one or two versions of the same house built around 1950.  I’m always looking for ways to make my house feel a little different than others that I walk into. I should also mention that my house is SMALL! Small is good – less cleaning, more cozy, less to take care of, but in this case, small also means no practical storage. Despite being here for over 5 years, my dream of having a well organized house, where everything has a home, has not yet been achieved. And so I “pin” for inspiration.  Sometimes my pins even become reality!

DIY/Crafting: I want to be one of those super-crafty creative people.  I’m really not. All I end up with is glue gun burns, paint on my clothes, and a big mess to clean up.  I dabble in scrapbooking, but that’s about where my craftyness ends – cutting and gluing.  All of those “Pinterest Fail”/“Nailed It!” pictures floating around the internet crack me up, because I could have taken any of them, I’m sure.

I already shared some of the baking successes I’ve have, so I thought I’d share a couple of Pinterest inspired house projects I’ve had completed or are currently working on. 

1) User Manual Binders


My Version:
This may not be the most exciting project, but it has helped keep one thing in my life in order – manuals.  Ugh. I hate them.  They used to be all over my house.  You never knew where you’d find them.  The snowblower manual was in the kitchen. The stove manual was in the living room. The TV manual was in the basement.  The washing machine manual was in the spare room.  There was no rhyme or reason to where a manual was.  The problem? They didn’t have a home.  Now they do! I had found a pin that suggested that I use binders and page protector sheets.  Each manual gets its own page protector and they all get put in the binder.  When I need a manual, I just look in my binder! Sometimes, when I’ve been REALLY organized, I’ve even put the receipt with the manual. 

 
2) My Super Simple Recipe Binder

Original Pin: There wasn't really ONE pin... I had found some ideas for storing recipes, and made this one my own.

My Version:
It’s great to have Pinterest, but you have to remember that the Internet is always changing. Just because something is there today, doesn’t mean it will be there tomorrow.  When I find a recipe I like, I always try to print it off. Of course, then it just gets bounced around from place to place until it eventually makes its way to the garbage or some random pile of papers.  One day, I sat down and made a Super Simple Recipe Binder, after looking at some examples on Pinterest.  Now, I have a place to put the recipes I’ve tried.  I can also keep note of changes I’ve made to the recipes, nutritional information, etc. I also made dividers to help organize my recipes - appetizers, soup, chicken, pasta, etc. Like the manual binder, it’s just a binder and page protectors.  Super cheap, super easy. It’s brilliant though, because if you’re a messy cook (like I am) the page protectors help keep your recipe clean as well as organized.  Also, if you print the recipe from a website, it will remind you where the recipe came from, in case you want to go back and look for more!!
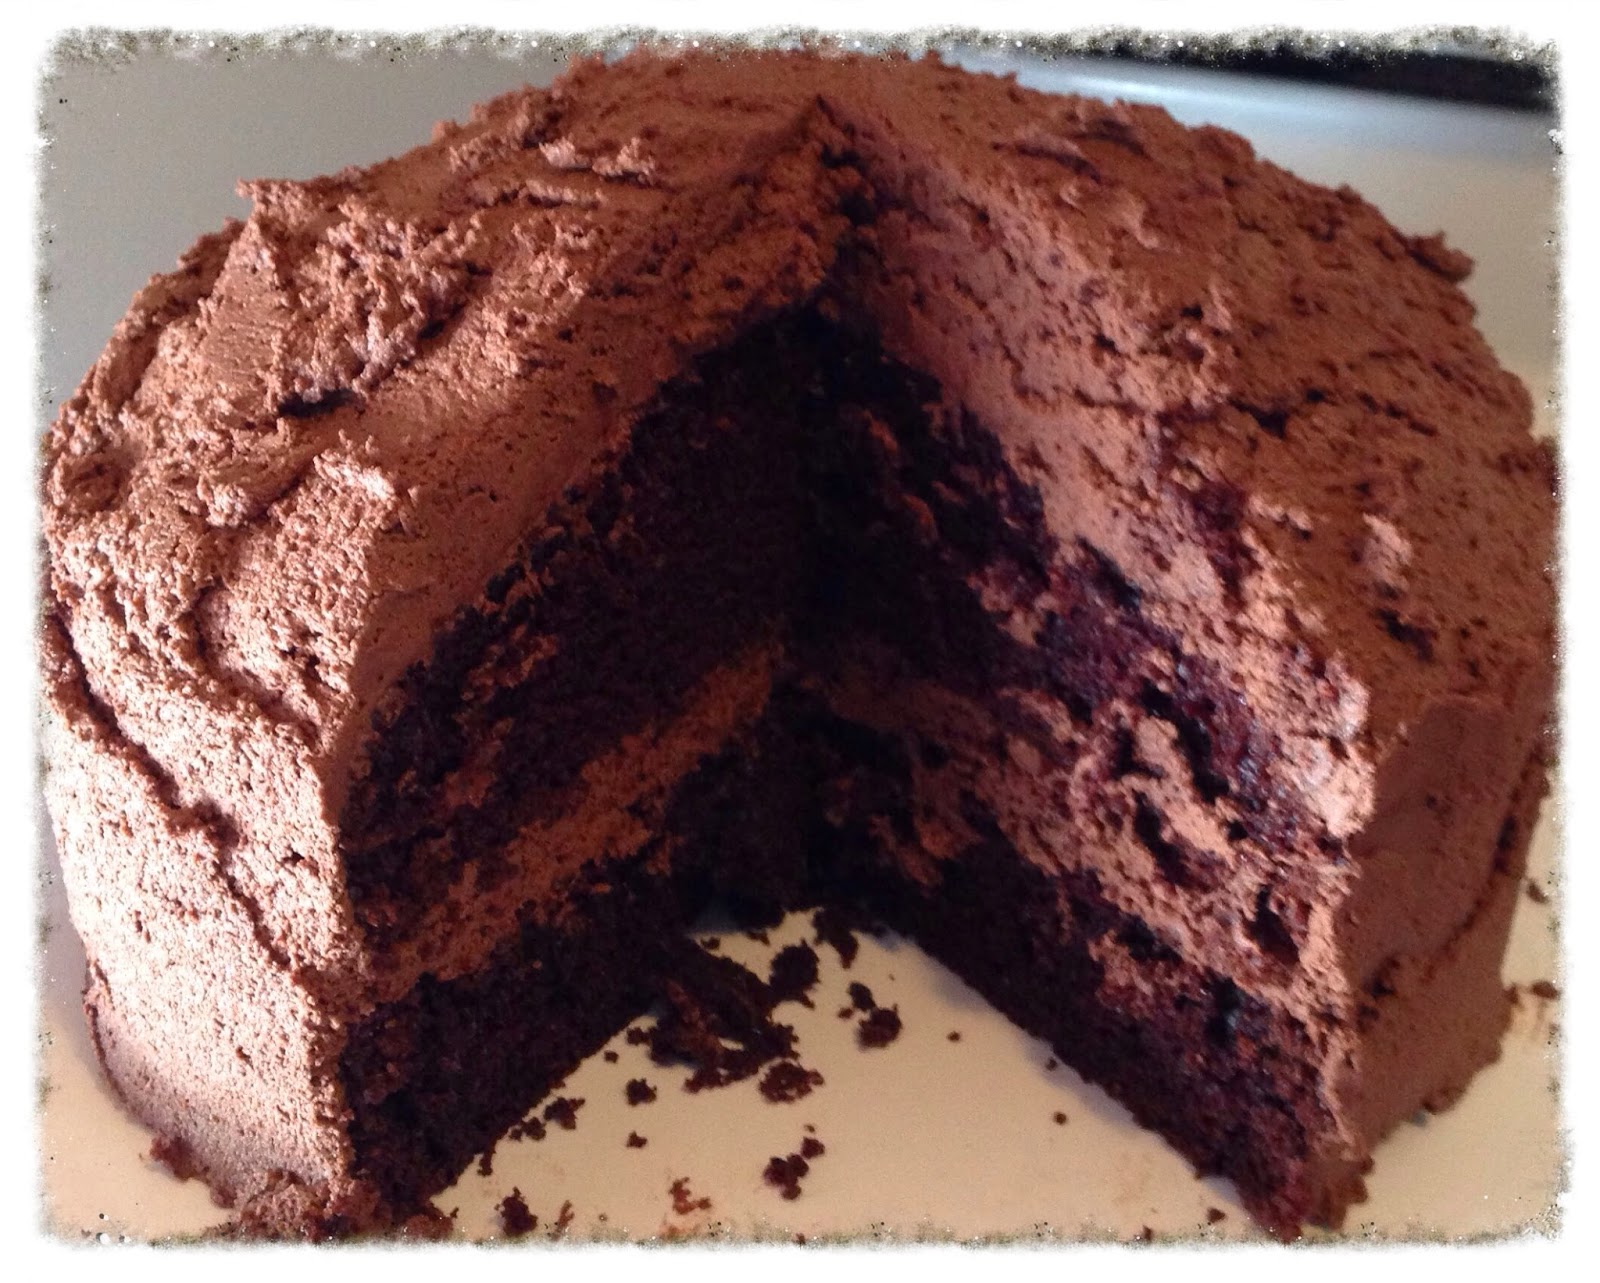
Notice the Chocolate Cake recipe from a previous post?  Yummy!
3) My Happy Jar

Original Pin: http://media-cache-ak0.pinimg.com/600x/16/4e/f9/164ef96947bce17aed08b3a775428aa3.jpg (I guess this is just a picture, but it’s pretty self-explanatory)

My Version:
I love my Happy Jar.  I found this idea around Christmas time. I had had a baby two months before, the dark cold winter months were starting, and even though I was really happy, I was feeling a bit overwhelmed with my new normal. First time mums have a lot to learn.  I felt like we were finally settling in to a routine, and wanted to make sure that I was focusing on the good things in life, so I wouldn’t slip into a really bad case of the winter blues. This idea was perfect, and again, SO EASY! It’s kind of like a year-long time capsule or a different version of a scrapbook. All you need is paper, a pen and some sort of jar/bucket/vase.  Just keep a jar on a shelf and throughout the year, throw in LOLs, memorable moments, C’s firsts, funny things, basically anything that would be a good thing look back on.  On New Years Day 2015, we’ll open up the jar, think back on 2014 with a smile and then start all over again.  To help make sure it was easy to add to, I cut up little pieces of colourful paper (so the jar looks colourful as it gets filled up) and put them in a box next to the jar and always keep a pen or two in the jar, so everything is right there, ready to go. The hardest part is not allowing myself to going into the jar to reread notes I’ve put in!

 
4) M&M Garden Stones -


My Version:
This is actually from a buzzfeed list (which I then pinned.)  As soon as I saw the picture of the M&M garden stones, I knew I needed to make them for a family member who loves all things M&M. They look super cute and were fun to make.  I bought outdoor craft paint and collected a few M&M shaped rocks at the beach.  Each rock was painted with coats of M&M coloured paint.  Then I made a stencil of the “M,” traced it on the rock with a pencil and painted it with white paint. My original plan was to spray it with some sort of shellac, but since I bought outdoor paint, I skipped that step.  They turned out great! Also, since they were a gift from my son, I got him to “sign” the back, but putting a handprint on one and little thumbprints on the others.  They were a bit messy, because he was 7 months old, but still little and cute. (Plus, that side will be facing the ground!)   


Those are my favourite projects, but I’ve got some other Pinterest-inspired projects on the go, so I’ll keep you updated!

Do you have a favourite Pinterest-Inspired Project you've made?

Monday, 7 July 2014

Baking Adventures

Since my post on healthy eating, all I can think about is baking. Funny how that is, eh? Luckily, I don’t have time to do any baking.  Well, at least I don’t have time before 10pm, which is never a good time to bake. Since no baking means no eating the entire batch of what I’ve baked before it goes stale, it’s a good thing.  I guess I can stick with my attempts at healthier eating, if I don’t have time to bake.

Baking is something I’ve always enjoyed, and have done it for as long as I can remember.  I know that this is a direct result of my grandmothers.  One grandmother baked with me every Saturday night.  It started with Easy Bake oven creations, but grew bigger and bigger over the years.  My other grandmother was affectionately known as “Cookie Nan.” How could I NOT like baking?   On top of that, my dad was always baking – bread, pinwheels, fudge, all kinds of tasty treats.  I’ve never had to wonder why I have a sweet tooth.

Over the past year, with my quest to sharpen up my “mom skills,” I had some goals that I wanted to accomplish in the baking department: 1) homemade chocolate cake, 2) bread, and 3) cheesecake.  I am happy to say that I was able to accomplish (with mixed success) all three!

1) 100% from Scratch Chocolate Cake:

I have always made my own frosting, but my cakes have always been from a box. Actually, I always thought that homemade cake was dry and dense.  Then I realized that most cake I’ve eaten didn’t come from a box, so I began searching for a really good homemade cake recipe.  My search started on Pinterest. Pinterest is both wonderful and horrible for scatterbrains like me – so many ideas! I read lots of recipes and reviews of the recipes until I found this one: http://addapinch.com/cooking/2013/01/25/the-best-chocolate-cake-recipe-ever/ With a name like “The Best Chocolate Cake Recipe Ever,” how could I go wrong? As a bonus, this blogger taught me about using espresso powder with chocolate. It is DELICIOUS! I love how it gives the cake a hint of a mocha flavour, without really tasting like coffee. What else can I add a little coffee to? Hmmm.

 
I should note that this picture was taken after the first time I made the cake.  The frosting tasted a lot better than it looked.  It was really light and fluffy, but wasn't as spreadable as I like. The next time I made it, I added a little extra milk to the recipe and it was a lot easier to frost the cake. 
 
 
2)  Bread:

I’d never baked bread before. My grandmother made the most delicious bread, as does my father, and many other relatives.  I felt like it was something I needed to know. Breadmaking should be in my genes, but to me, it seemed scary.  All that mixing, kneading, and waiting. Then there was the yeast. I always seem to kill the yeast.  I'd make the water was too hot, or too cold, or I waited too long, or didn’t wait long enough.  This is where the science comes into play.  Then there was the kneeding. Yikes. Luckily, I have a Kitchenaid Mixer with the dough attachment, so that took some of the pressure off.  I then took some time (an hour? two hours? three days? a week? Pinterest sucks you in!) and found a recipe to try. It was great, because it walked me through the whole process. That recipe can be found here: http://offthegridat-30.blogspot.ca/2011/12/how-to-make-my-husband-happy.html I ended up dividing the recipe into four loaves the next time I made it, because as you can see below, when I made three loaves, they were a little oversized: 


 As a side note, this is from a blog about a woman who lives “off the grid.” It’s interesting and worth a read. Sadly, I just read that they are selling their unique home, due to illness.  Maybe you know someone who wants to live in Saskatchewan and are looking for a change of pace - it may be worth checking out!

3)  "Real" Cheesecake:

Baked cheesecake always seemed like it would be really tricky. All the fear of overbaking, underbaking, or cracking.  I felt like it would be a real accomplishment to successfully make one.  I also figured that if I was going to spend the time making one, it had better be a good one – full of sugar. I found an Oreo crust cheesecake. (Found here: http://allrecipes.com/Recipe/OREO-Ultimate-Turtle-Cheesecake/) It wasn’t nearly as difficult as I expected, although I did stress every second of the baking process, watching for signs of over baking or cracks forming. Sadly, it did get some small cracks when cooling, but it WAS fully cooked, and had the potential for putting me in a sugar coma. Also, the caramel pecan chocolate topping covered up all the little cracks, so if I ever make one again, it will be one with some sort of topping.  It’s funny though. Once I accomplished it, I had no desire to make another.  Probably because the sugar has never fully left my system.   
(I really need to get some serving plates.  Although you can hardly see it here, my Nightmare Before Christmas platter doesn't always go with what needs to be served!)


So, what’s next? I thought about it, and I've have three new baking goals:
1)  scones - something maple-y and walnut-y
2) carrot cake - I've recently discovered that I actually like carrot cake.  I'm wondering if I can find a "healthy" carrot cake.  That's the goal!
3)  My husband’s birthday coming up, and I'm probably going to try to make a cake.
 
I’ll keep you posted!

Saturday, 5 July 2014

Adventures at the Children’s Forest

Last night, I was able to check something off my summer bucket list! Last fall, the Irving Nature Park opened its newest expansion, the Children’s Forest.  I haven't managed to get myself there.  Last night, we had an extra "little" hanging out with us, so we decided to give it a go. 

I feel like I’ve been waiting for it to open my entire life.  Well, maybe not that long, but it's been a LONG time! The Irving Nature Park has been around for many years, as has the Sheldon Point Trail, which is located on the way to the Nature Park.  It seems that this section of land (found on the way to the Nature Park) has been “in the works” for as long as the Nature Park has been around.  Maybe it has.  I'm not really sure when it started to be developed, but my husband thinks they were started around the same time.  Whenever I went to the park, I always wondered what would become of the space.  There were roads and bridges built, a pond, and tightly planted sections of trees.  I had heard rumours of a natural maze, which explained the tightly planted groups of trees that grew bigger and bigger each year.  I eagerly awaited its opening. It took YEARS (which only makes sense, because trees don’t grow over night!)

Last August, it finally opened. After years of waiting... I didn’t even go! Unbelievable. Well,  not really, because at that point, I didn't have a child, and it was called the "Children's Forest."  I was also very pregnant and it was a HOT summer. It doesn't matter now though, because my waiting ended last night.  


We drove in, and discovered there was a nice little driving path. We drove over the little bridge, around a few turns, past a picnic area, until we reached a parking/playground area.  I was immediately impressed with the playground, but we decided to head to the maze.  

The Rules
We started at the beginning (which is a good place to start.) That's where it got serious. Which enterance would we take? Left or Right? After much thought, and a round of "eanie, meanie, miney, moe) we chose the right.  It was an extremely tough decision. (Haha!)

Of course, each fork in the path required another decision. We would take turns making the choice, even looking for clues from Little C on which turn to take. (“I think his right finger moved! That means he wants to go right!” or “His left toe wiggled.  Let’s go!”


Surprisingly, we managed to make it through the maze rather quickly.  Although we were excited, the middle of the maze was a bit of a letdown. I thought there would be some sort of flag or statue, something to help celebrate our victory. 
We made it to the middle!
Of course, the letdown was shortlived, because we had to keep going until we found the exit. Then, because according to the map, we had only explored half of the maze, we went in the exit, and weaved our way through the maze again.  There seemed to be more dead ends and circles through this half.  It made me realize how fun (or maybe frustrating, for some?) it would be if you had made some wrong choices the first time through.  You could be in there for quite a while. It also proved that we must be champion maze explorers. After all, we had skilfully manoeuvred our way through the maze, without getting lost and had quickly found our way to the middle! J
From a baby stroller point of view, I was equally impressed with the maze.  I had been a bit worried that the pathways wouldn’t be wide enough for the stroller.  I was happy to discover that they were very easy to manuever with our rather large stroller.  I assume that it would also be wheelchair accessible.  The paths were fairly flat and made of packed dirt, not gravel, which makes it easier to roll on.
After the maze, we headed for the playground, which I was thought was great!  It's small, but since it wasn't busy, we got to enjoy it. The swings had “big kid” and “little kid” swings - perfect, because I was with one of each!  There were slides, a climbing wall, little animals to sit and teeter on, and other jungle gym type structures.  Little C loved the swings.  He’s been on swings before, but these seemed special.  He was kicking his feet and squeeling the whole time.  The higher the better!  I also took him down a couple of slides, but the swing was the winner!
I love the swings!


climbing wall
I thought the climbing wall was great! It was a wave-like shape, and had gravel-sized pieces of rubber under it. I guess I’m still new to playgrounds, since my son is only 8 months old, and I hadn’t spent much time at a playground in the past 15-plus years.  They’re different now! Anyway, I had always thought that the recycled tires used at playgrounds were fused together to form something resembling a mat. Apparently it’s actually like gravel! Who knew? (Probably everyone but me!) Are they all like that? I’ll have to do some more exploring.


fancy rubber gravel

After a good play, and before we were eaten by the mosquitos, we decided to head to the Pumpkin Patch for a celebratory ice cream. Afterall, we were maze champions! (Could you say that we were "a-MAZE-ing"??) Much to our surprise, when we were driving out, we realized that we had missed a maze! Of course there was another maze!  How could we have missed it!?!? I guess that means that we’ll be going back soon.  Maybe next time, we’ll bring a picnic.  It really was fun for everyone - big and small.  Definitely an added gem for the city.

Thursday, 3 July 2014

BBQ Success! (I’m probably the last person on earth to figure this out!)

I successfully barbequed last night.  I realize that’s not a real accomplishment for most, but for me, it is. I think the only thing I have barbequed before is a hot dog, and that’s with mixed results. You see, the problem with barbequing is that I have to pay attention.  Difficult for a scatterbrain.  You have to remember to  really pay attention - make sure the wind doesn’t blow out the flame; be on the look out for flare-ups and hot spots; and flip, flip, flip.  Really, it’s just too much for me. But I did it. The chicken wasn’t burnt, raw, bland or even dried out. Success. I was really proud. I don't think my husband, who normally does the barbequing was nearly as excited as I was, but he did admit that it was tasty.  

The best part? It was easy.  All I did was put a little S & P on the chicken, preheated the BBQ and then turned it to medium, and flopped the chicken on the grill. Open cover, turn chicken, close cover, and repeat until cooked through. Easy peasy... and delicious! It was quick and there were no dishes.  I think I’ll even try it again.  Why has it taken me so long to figure this out?

Wednesday, 2 July 2014

Photography, Cameras, Apps, and Photo Challenges.


Photography is something that I’ve enjoyed for many years, but have never really put my all into it.  I’ve always had a “good” camera and have wanted to take a photography class for a long time, but have never gotten around to it.  I don’t know why... maybe time or not really knowing where to go for it.  Maybe someday. <sigh>  Until then, I will learn little bits at a time.

My current “good camera” is my Nikon 3100. I love it. I feel like anyone could take a nice picture with it – a great camera for beginners or want-to-be-photographers. Best part? I can set it to “Guide,” and it will walk me through different settings, teaching me what to do along the way. It makes experimenting a lot easier, and my experiments are more likely to turn out. I’ve taken some beautiful shots and love the quality of the pictures.  It’s definitely my preferred “picture taking tool.” The only downfall is that it’s bulky. 

I also take a lot of pictures with my iPhone.  Like, A LOT. (It’s almost a joke. It’s getting to the point that my son poses whenever anyone pulls out their cellphone. He’s only 8 months old! I need help. Seriously.) The downside is that the photos aren’t the same quality as my camera, but they are a lot better than camera phones used to be. The benefit is that my phone is usually with me or within an arm’s reach, so it’s handy.  I am able to get unexpected pictures when my camera is still in its case or sitting at home.  I find that I can capture some really great “moments” because it’s always closeby.  If my better camera isn’t already out, it sometimes feels artificial when I run to get it, take it out of its case, and get it ready.  My iPhone may not take the best quality pictures, but sometimes they can capture moments that I wouldn’t be able to capture otherwise. 

There is an added bonus to taking photos on my iPhone – the photo editing apps. They’re fun. I know some people don’t like edited photos, and I can be one of those people sometimes, but I think it’s fun to play with pictures.  Sometimes you can take a picture that looks like garbage and turn it into something neat. My favourite photo editing app right now is Aviary.  It was a bit of a random find, but I really like it. It’s easy to use, and you don’t have to post your pictures online when you’re done, although you can post to Instagram, Facebook, Twitter or send it out via email or text, which is a nice feature.

Speaking of which, I’m also a fan of Instagram and have been posting more pictures there, although they are very random.  I like the sharing aspect, and like seeing what other people post. I’ve been amazed with people who have started and managed to follow through with photo a day challenges, like #100DaysOfHappy. Posting a photo every day is certainly a challenge, and I don’t know how people do it for 100 days! That’s a lot of days. I’m also fascinated by what people post. I love seeing what makes them happy or what they’ve deemed important. So, I decided that I’d try a (shorter) photo challenge.  YummyMummyClub.ca hosts a photo a day challenge each month.  This month, it’s the #BlissPhotoADay Challenge(If you want to know more, check it out here: http://www.yummymummyclub.ca/blogs/melissa-gaston-find-the-light/20140623/blissphotoaday-challenge-july-2014) I’ve decided I’m going to take a shot.  I’m already off to a bad start, because I started a day late, but I’m going to give it a go.  I’ll post the pictures to Instagram and some will probably make their way over to twitter or my personal facebook page. 

Here’s a peek:


Today’s picture had to fall under the theme of shoes. It was easy. I looked down and saw my very-worn, very-comfy Birkenstocks on my feet. I wear these for most of the day. Currently, they help with my plantar fasciitis, but they have been with me for a few years and have seen a lot. There are some teeth marks on the leather and some flaking cork because these were my dog’s shoes of choice to use as a chew toy. I always know that summer is on its way when I can start wearing them, and am sad to see the fall ending when I have to tuck them away in the closet.  They were the only shoes I could wear from the middle of June last year, when I was 5 months pregnant, and the heat started to rise, and they saw me through the final months of my pregnancy and for an entire month after my son was born, when no other shoes would fit.  They really do hold a special place in my heart.   

Follow me on Instagram and make sure I stick to it! http://instagram.com/TIFFS2012

Blueberry Pie and A Beautiful Drive!

Yesterday, I went for a drive all by myself. I feel like this shouldn't be news, but usually I have C in tow, and although he makes road...